Videos mit beweglichen Objekten

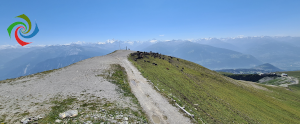
Die Idee hinter diesem Kapitel unserer Python-Kurse ist es, einen Film aus einem oder mehreren Bildern zu erstellen, in dem ein oder mehrere Objekte auf statischen Bildern herumbewegt werden. Wir werden feste Objekte oder durchscheinende Wasserzeichenobjekte über Bilder bewegen. Wir haben ein Bild mit einer Wasserzeichenstruktur für unser Kapitel über Dekoratoren und Dekoration erstellt. Sie können es ganz oben auf der Seite sehen: Ein "kaufmännisches Und" (in der Python-Gemeinschaft besser bekannt als das Dekorator-Zeichen. Sie können auch einen Kurs finden, wie man Bilder mit Wasserzeichen wie dieses erstellt mit Python, Numpy, Scipy und Matplotlib in dem Kapitel Bildverarbeitungstechniken. Darin wird der gesamte Prozess der Erstellung unseres Dekorators und des Bildes mit dem Zeichen, d.h. der mit Wasserzeichen versehenen Bilder, erklärt. Es ist also eine gute Idee, diese Kapitel zu lesen, bevor man weitermacht.
Technische Anmerkung: opencv muss für die folgenden Python-Code-Beispiele installiert sein.
Interessante Objekte mit Matplotlib erstellen
Wir beginnen mit der Erstellung einiger interessanter Objekte, die wir in den Videos, die wir erstellen wollen, als bewegliche Objekte verwenden können. Wir beginnen mit der Erstellung eines Verzeichnisses, in dem die Objekte gespeichert werden:
import os
import shutil
target_dir = 'images4video'
watermarks_dir = f"{target_dir}/watermarks_dir"
if os.path.exists(watermarks_dir):
    # delete the existing directory
    shutil.rmtree(watermarks_dir)
# Create target_dir, because it doesn't exist so far
os.makedirs(watermarks_dir)
Wir verwenden im folgenden Code den Parameter bbox_inches="tight" in savefig.
Wenn dieser Parameter auf "tight" gesetzt ist, versucht matplotlib, alle zusätzlichen Leerzeichen oder Padding an den Rändern der Abbildung zu entfernen, so dass nur der eigentliche Inhalt der Abbildung gespeichert wird. Dies kann nützlich sein, wenn man eine Abbildung mit minimalen Rändern oder Auffüllungen speichern will.
import numpy as np
import matplotlib.pyplot as plt

x = np.linspace(-2, 2, 1000)
y1 = np.sqrt(1-(abs(x)-1)**2)
y2 = -3 * np.sqrt(1-(abs(x)/2)**0.5)

fig, ax = plt.subplots()

ax.fill_between(x, y1, color='red')
ax.fill_between(x, y2, color='red')
ax.axis(xmin=-2.3, xmax=2.3)
ax.axis('off')
#ax.xlim([-2.5, 2.5])
txt2include = "python-kurs.eu"
ax.text(0, -0.4,
         txt2include,
         fontsize=24,
         fontweight='bold',
         color='orange',
         horizontalalignment='center')

plt.savefig(f"{watermarks_dir}/heart.png", bbox_inches="tight")
Wir erzeugen nun ein Bild mit einer schwarz-weißen Spirale:
import numpy as np
import matplotlib.pyplot as plt

theta = np.radians(np.linspace(0, 360*5, 1000))
r = theta**2
x_2 = r*np.cos(theta)
y_2 = r*np.sin(theta)
plt.figure(figsize=[5, 5])
plt.gcf().set_size_inches(10, 10)
plt.plot(x_2, y_2, linewidth=50.5, color='black')
plt.axis('off')
plt.savefig(f"{watermarks_dir}/spiral.png", bbox_inches="tight")
plt.show()
Wie sieht es mit Farben aus? Eine andere Spirale, aber jetzt in Farben:
import matplotlib.pyplot as plt
import numpy as np

theta = np.arange(0, 8*np.pi, 0.1)
a, b = 1, 0.5

for dt in np.arange(0, 2*np.pi, np.pi/2.0):
    x = a*np.cos(theta + dt)*np.exp(b*theta)
    y = a*np.sin(theta + dt)*np.exp(b*theta)
    dt = dt + np.pi/4.0
    x2 = a*np.cos(theta + dt)*np.exp(b*theta)
    y2 = a*np.sin(theta + dt)*np.exp(b*theta)
    xf = np.concatenate((x, x2[::-1]))
    yf = np.concatenate((y, y2[::-1]))
    p1 = plt.fill(xf, yf)

plt.axis('equal')
plt.axis('off')
plt.tight_layout()
plt.savefig(f'{watermarks_dir}/coloured_spiral.png', bbox_inches="tight")
Größe eines Bildes
Die folgende Funktion gibt die Größe eines Bildes als Tupel (Breite, Höhe) zurück. opencv muss installiert sein, damit Sie das cv2-Modul verwenden können:
import cv2

def get_frame_size(image_path):
    """ Reads an image and calculates
    the width and length of the images,
    which will be returned """
    frame = cv2.imread(image_path)
    height, width, layers = frame.shape
    frame_size = (width, height)
    return frame_size

get_frame_size(f"{watermarks_dir}/spiral.png")
Zufällige Kachel (tile) im Bild
Jetzt definieren wir eine Funktion random_tile, die die Koordinaten (obere linke Ecke und untere rechte Ecke) einer Kachel im Bild img zurückgibt. Die Größe dieser Kachel ist gleich der Größe des Objektes bzw. Wasserzeichenbildes, das der Funktion übergeben wird:
import random

def random_tile(img, watermark_image):
    """ returns the top left and bottom right corner
    of a random tile in an image. The size correspondents to
    the size of the watermake image """
    height, width, colours = img.shape
    w_height, w_width, colours = watermark_image.shape
    tile_upper_left_row = int(round(random.randint(0, height - w_height), 0))
    tile_upper_left_column = int(round(random.randint(0, width - w_width), 0))
    top_left = tile_upper_left_row, tile_upper_left_column
    bottom_right_row = int(round(tile_upper_left_row + w_height, 0))
    bottom_right_column = int(round(tile_upper_left_column + w_width, 0))
    bottom_right = bottom_right_row, bottom_right_column
    return top_left, bottom_right
Wir werden cv2.imread verwenden, um ein Bild einzulesen, das wir in unseren Beispielen verwenden wollen. Wir könnten auch cv2.imshow verwenden, aber das öffnet ein externes Fenster im Jupyter-Notebook, das wir zum Erstellen dieser Website verwenden. Das ist der Grund, warum wir plt.imshow verwenden, um das Bild zu betrachten. Wir müssen die Farben spiegeln, bevor wir plt.imshow verwenden können, da wir mit cv2.imread ein BGR-Bild (blau, grün, rot) erhalten, während plt.imread RGB-Bilder liefert.
import matplotlib.pyplot as plt
import random
import numpy as np
import cv2

image = cv2.imread("images4video/paths/pic_004.jpg")
rgb_img = image[:, :, ::-1]  # BGR ---> RGB
#plt.axis('off')
plt.imshow(rgb_img)
spiral = cv2.imread(f"{watermarks_dir}/spiral.png")
rgb_spiral = spiral[:, :, ::-1]  # BGR ---> RGB
plt.imshow(rgb_spiral)
Wir testen unsere Funktion random_tile mit diesen beiden Bildern:
top_left, bottom_right = random_tile(image, spiral)
print(f"{top_left=}, {bottom_right=}")
print(f"{spiral.shape=}, {image.shape=}")
Es ist zu erkennen, dass die Abmessungen der zufälligen Kachel dem Wasserzeichenbild entsprechen:
height_of_tile = bottom_right[0] - top_left[0]
width_of_tile = bottom_right[1] - top_left[1]
print( (height_of_tile, width_of_tile) == spiral.shape[:2])
Schauen wir uns ein weiteres Bild an. Diesmal geht es in den Hafen von Konstanz am Bodensee:
import matplotlib.pyplot as plt
import random
import numpy as np
import cv2

image2 = cv2.imread(f"{target_dir}/bodensee_area/konstanz.jpg")
rgb_img2 = image2[:, :, ::-1]  # BGR ---> RGB
plt.imshow(rgb_img2)
Wasserzeichen mit zusätzlichem Bild
Mit Hilfe der Funktion watermark_tile können wir ein Wasserzeichen auf den Bereich der Kachel setzen, der durch die Parameter oben_links, unten_rechts. Das Wasserzeichen soll schwarz und weiß sein. Wenn das Wasserzeichen schwarz ist, werden die entsprechenden Pixel von imag2 genommen, wenn es weiß ist, werden die Pixel von imag1 genommen.
def watermark_tile(imag1, imag2, watermark_imag, top_left, bottom_right):
    """ The pixels of imag2 are used when the watermark_imag is black """
    r1, r2 = top_left[0], bottom_right[0]
    c1, c2 = top_left[1], bottom_right[1]
    tile = imag1[r1:r2, c1:c2]
    tile[:] = np.where(watermark_imag>(1, 1, 1), imag1[r1:r2, c1:c2], imag2[r1:r2, c1:c2])
Wir testen diese Funktion nun mit den Bildern 'image', 'image2' und 'spiral' als Wasserzeichenbild:
watermark_tile(image, image2, spiral, top_left, bottom_right)
rgb_img = image[:, :, ::-1]  # BGR ---> RGB
plt.imshow(rgb_img)
Wasserzeichen auf Kachel
Nun wollen wir ein Wasserzeichen direkt auf das Bild "imag1" setzen. Wir verwenden ein farbiges Bild als Wasserzeichen.
def object_on_tile(imag1, object_image, top_left, bottom_right):
    """ The object is put over the image """
    r1, r2 = top_left[0], bottom_right[0]
    c1, c2 = top_left[1], bottom_right[1]
    #print(f'{object_image=}')
    #tile = imag1[r1:r2, c1:c2]
    imag1[r1:r2, c1:c2] = np.where(object_image>(250, 250, 250),
                                   imag1[r1:r2, c1:c2],
                                   object_image)
watermark_image = cv2.imread(f"{watermarks_dir}/coloured_spiral.png")
rgb_watermark_image = watermark_image[:, :, ::-1]  # BGR ---> RGB
plt.imshow(rgb_watermark_image)
watermark_image.shape
image = cv2.imread(f"{target_dir}/bodensee_area/boat.jpg")
plt.imshow(image[:, :, ::-1])
top_left, bottom_right = random_tile(image, watermark_image)
object_on_tile(image, watermark_image, top_left, bottom_right)
rgb_img = image[:, :, ::-1]  # BGR ---> RGB
plt.imshow(rgb_img)
image.shape
watermark_image = plt.imread(f"{watermarks_dir}/spiral.png")
watermark_image = watermark_image[:, :, :3]
#imag = cv2.imread("images/20210617_201910.jpg")
plt.imshow(watermark_image)
#cv2.imshow(image)
Kachel nahe beieinandeer
Wir schreiben nun eine Funktion new_close_tile, die zufällig eine neue Kachel in der Nähe einer bestehenden Kachel in der Umgebung radius findet.
import random

def new_close_tile(top_left, bottom_right,
                   img_width, img_height,
                   radius):
    """ finds randomly a new tile close to the given tile
    in a distance radius """
    row1, row2 = top_left[0], bottom_right[0]
    col1, col2 = top_left[1], bottom_right[1]
    x = random.randint(-radius-1, radius+1)
    y = random.randint(-radius-1, radius+1)
    tile_height = row2 - row1
    tile_width = col2 - col1
    row1_new, row2_new = row1 + y, row2 + y
    col1_new, col2_new = col1 + x, col2 + x
    while (row2_new > img_height) or row1_new < 0 or col1_new < 0 or col2_new > img_width:
        x = random.randint(-radius-1, radius+1)
        y = random.randint(-radius-1, radius+1)
        row1_new, row2_new = row1 + y, row2 + y
        col1_new, col2_new = col1 + x, col2 + x
    return ((row1_new, col1_new), (row2_new, col2_new))
Wir werden nun die Funktion new_close_tile testen:
# find a tile:
top_left, bottom_right = random_tile(image, watermark_image)
print(f"{top_left=} {bottom_right=}")
img_height, img_width, colours = image.shape
for i in range(5):
    top_left, bottom_right = new_close_tile(top_left, bottom_right,
                                            img_width, img_height,
                                            radius=4)
    print(f"New tile positions: {top_left=} {bottom_right=}")
Bilder mit beweglichen Wasserzeichen
n = 40
watermark_pics = f'{target_dir}/watermark_pics'
if os.path.exists(watermark_pics):
    shutil.rmtree(watermark_pics)
os.makedirs(watermark_pics)
watermark_image = cv2.imread(f"{watermarks_dir}/coloured_spiral.png")
watermark_image = watermark_image[:, :, :3]
image_orig = cv2.imread(f"{target_dir}/paths/pic_004.jpg")
height, width, colours = image_orig.shape
top_left, bottom_right = random_tile(image, watermark_image)
print(top_left, bottom_right)
for i in range(n, 0, -1):
    image = image_orig.copy()
    top_left, bottom_right = new_close_tile(top_left, bottom_right, width, height, 20)
    object_on_tile(image, watermark_image, top_left, bottom_right)
    cv2.imwrite(f"{watermark_pics}/pic_{i:03d}.png", image)
def video_from_images(folder='.',
                      video_name = 'video.avi',
                      suffix='png',
                      prefix='pic_',
                      reverse=False,
                      length_of_video_in_seconds=None,
                      codec = cv2.VideoWriter_fourcc(*'DIVX')):
    """ The function creates a video from all the images with
    the suffix (default is 'png' and the prefix (default is 'pic_'
    in the folder 'folder'. If 'length_of_video_in_seconds' is set
    to None, it will be the number of images in seconds. If a positive
    value is given this will be the length of the video in seconds.
    The function assumes that the the shape of the first image is
    the one for all the images. If not a warning will be printed
    and the size will be adapted accordingly! """

    images = []
    for fname in glob.glob(f'{folder}/{prefix}*{suffix}'):
        images.append(fname)
    images.sort(reverse=reverse)
    if length_of_video_in_seconds is None:
        # each image will be shown for one second
        length_of_video_in_seconds = len(images)

    # calculate number of frames per seconds:
    frames_per_second = len(images) / length_of_video_in_seconds
    frame_size = get_frame_size(images[0])

    video = cv2.VideoWriter(video_name,
                            codec,
                            frames_per_second,
                            frame_size)

    for image in images:
        im = cv2.imread(image)
        height, width, layers = im.shape
        if (width, height) != frame_size:
            print(f'Warning: {image} resized from {(width, height)} to {frame_size}')
            im = cv2.resize(im, frame_size)
        video.write(im)
    cv2.destroyAllWindows()
    video.release()
Wir haben 40 Bilder erzeugt und wir erzeugen nun ein Video mit einer Länge von 40 Sekunden:
import glob
video_from_images(watermark_pics,
                  f'{target_dir}/colour_spiral.avi',
                  'png',
                  length_of_video_in_seconds = 40)
Für das nächste Video benutzen wir eine schwarz-weiße Spirale. Wir laden sie zuerst:
watermark_image = cv2.imread(f"{watermarks_dir}/spiral.png")
plt.imshow(watermark_image[:,:,::-1])
n = 40
watermark_pics = f'{target_dir}/watermark_pics2'
if os.path.exists(watermark_pics):
    shutil.rmtree(watermark_pics)
os.makedirs(watermark_pics)

image_orig = cv2.imread(f"{target_dir}/paths/pic_002.jpg")
imag_tinted = image_orig // 2
for i in range(n, 0, -1):
    image = image_orig.copy()
    top_left, bottom_right = random_tile(image, watermark_image)
    watermark_tile(image, imag_tinted, watermark_image,  top_left, bottom_right)
    cv2.imwrite(f"{watermark_pics}/pic_{i:03d}.png", image)
import glob
video_from_images(watermark_pics,
                  f'{target_dir}/spiral.avi',
                  'png',
                  length_of_video_in_seconds=40)
Die Videos, die wir in diesem Tutorial erstellt haben, kann man sich hier anhören:
Ich habe diese Technik verwendet, um Videos für Musikkompositionen von mir zu erstellen. Die Videos sind bei YouTube zu finden:
Musikstück für Klavier, Saxophon, Oboe und Schlagzeug Die Tonspur habe ich mit dem Linux-Programm kdenlive hinzugefügt.
Alle meine Videos, einschließlich eines Python-Videos, findet man unter Bernd Klein's Videos


 Buch kaufen
 Buch kaufen
 Buch kaufen

